Conclusion
This chapter has been devoted to presenting the proposed
solution, detailing both its design and all the tools used to implement it. We
have also described the various stages of the development process, providing an
overview of the approach taken to bring the application to fruition. The next
chapter will be dedicated to illustrating this solution by presenting some of
the application's key interfaces.
26
Chapter3
Presentation of the solution and discussions
Introduction
After our solution was implemented, several tests were
carried out to verify that it met the client's needs and complied with the
planned non-functional requirements. This chapter presents some interfaces
captured during the tests carried out on the solution, and a discussion of the
shortcomings of the present work.
3.1 Presentation of the software
3.1.1 Visual Identity 3.1.1.1 Main logo
design
The CardioTrain logo illustrates the alliance between
medicine and innovation. The virtual reality headset symbolises immersive
learning, while the electrocardiogram curve joins a heart, evoking life and
cardiology. Understated and modern, it reflects the ambition to train
differently in order to provide better care.
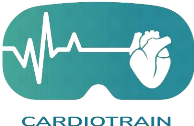
Figure 3.1: CardioTrain Logo
Chapter 3. Presentation of the solution and discussions 3.1.
Presentation of the software
27
3.1.1.2 Color palette and visual harmony
The color palette that we have created for CardioTrain
reflects the dual essence of healthcare and technology. It contains:
· The dominant teal shades (#27828C,
#278793, #3F9C94) which are the main colours and evoke calm,
confidence and scientific precision, essential values in the medical field.
· The brighter blue (#048ABF) that
introduces a sense of innovation and vitality, symbolizing the energy of
learning and progress.
· The light gray (#F2F2F2) that ensures
visual balance and clarity, providing a neutral background that enhances
readability and highlights the main elements.
Together, these colors create a serene yet dynamic atmosphere
that mirrors the mission of CardioTrain : offering an immersive, safe, and
forward-thinking learning experience in cardiology.
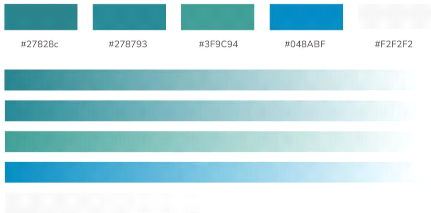
Figure 3.2: CardioTrain Color Palette
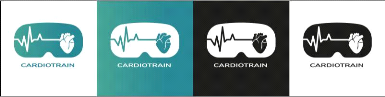
3.1.1.3 Logo variations and adaptations
To ensure flexibility and visual consistency across all
communication materials, the CardioTrain logo was designed in multiple versions
adapted to various backgrounds.
The primary version, featuring the teal gradient, embodies
the full identity of the brand and is mainly used for digital and presentation
purposes.
The monochrome versions, in black and white, ensure
readability and contrast when color reproduction is limited or when simplicity
is preferred, such as on official documents or technical assets.
Finally, the inverted version allows seamless integration on
dark or photographic backgrounds while maintaining the logo's clarity and
impact.
These variations guarantee that the CardioTrain identity
remains recognizable and professional across all contexts from digital media to
print and immersive environments.
Chapter 3. Presentation of the solution and discussions 3.1.
Presentation of the software
Figure 3.3: CardioTrain logo variations 3.1.1.4 Logo
usage guidelines and restrictions
To preserve the integrity and visual coherence of the
CardioTrain identity, the following rules must be strictly observed. It is
strictly prohibited to:
· Modify the logo colors or apply non-approved color
variations.
· Rotate, tilt, flip, distort, stretch, compress, or
alter the logo's proportions or original orientation in any way.
· Add special effects such as shadows, glow, gradients,
or textures.
· Place the logo on a busy or overly contrasted
background that compromises its readability.
· Add any unapproved elements to the logo (extra text,
icons, or slogans).
· Use unofficial, recreated, or outdated versions of the
logo.
· Display the logo below the minimum readable size
(recommended minimum width: 5cm / 189 px).
These restrictions ensure that the CardioTrain logo remains
consistent, professional, and immediately recognizable across all
applications.
3.1.1.5 Visual applications
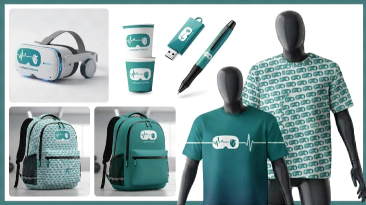
Figure 3.4: A few examples of the logo in use
28
Chapter 3. Presentation of the solution and discussions 3.1.
Presentation of the software
3.1.2 Software interfaces
· Choice of experience
When the software starts up, a splash screen is shown before
the home interface where the user must choose the experience they wish to
perform. At this stage, the user can choose between viewing 3D models (healthy
heart, obstructed heart or operating room) and performing one of the surgical
procedures in assisted or autonomous mode.
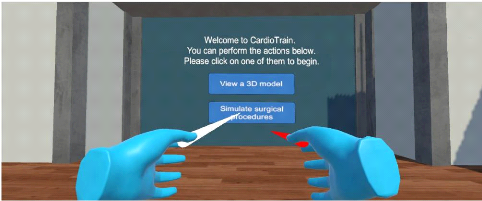
Figure 3.5: Home interface
· Selecting and choosing an instrument
The user sees all the instruments laid out on a medical
trolley. When the user hovers over each instrument with the joystick pointer,
the corresponding name is displayed, allowing it to be clearly identified. Once
the desired instrument has been identified, the user can select it using the
joystick to use it in the experiment.
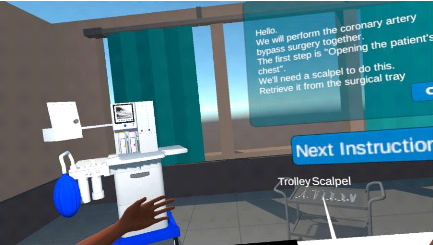
Figure 3.6: Selecting and choosing an instrument
29
· Chapter 3. Presentation of the solution and discussions
3.1. Presentation of the software
30
Assisted experience flow VS Autonomous experience
flow
- Assisted mode: The software provides
step-by-step instructions that guide the user throughout the simulation. Each
task is presented in a specific order to ensure proper understanding and
execution. This mode is ideal for beginners or users who prefer a structured
approach.
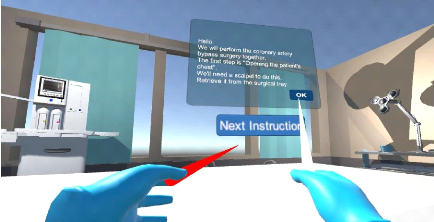
Figure 3.7: Assisted CABG
- Autonomous mode: The user explores and
completes the simulation freely, without guided instructions. This mode
encourages self-paced learning and allows for more independent practice, ideal
for reinforcing previously acquired knowledge.
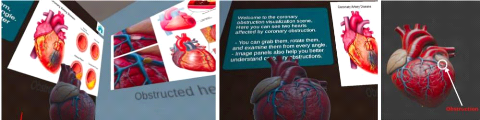
· 3D models and room exploration
Users can move freely around the virtual room and interact
with detailed 3D anatomical models. When they hover over an element, text
descriptions appear to provide additional information. They can also observe a
healthy heart and a blocked heart to better understand the anatomical
differences and medical implications.
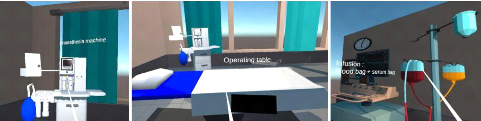
Figure 3.8: some 3D operating room exploration screenshots
Chapter 3. Presentation of the solution and discussions 3.2.
Challenges encountered and solutions
31
Figure 3.9: some 3D hearts exploration screenshots
3.2 Challenges encountered and solutions
During the development of the project, we faced several
challenges both at the technical and design levels.
The 3D modeling phase raised particular difficulties,
especially with highly complex medical equipment such as the heart-lung machine
and the anesthesia machine. Due to their intricate structures, these models
were downloaded from Sketchfab instead of being modeled from blender. In
addition, 3D models significantly affected both application performance and the
overall build size, making the application heavier than expected. In order to
address this, we optimized the models by reducing polygon counts, simplifying
textures, and selectively replacing certain components with lighter assets,
which allowed us to preserve realism while maintaining smooth execution.
Another issue arose when importing models and animations from
Blender to Unity. In several cases, the process resulted in visual glitches,
unexpected physical collisions, or partial loss of animations. These problems
were progressively fixed by carefully reviewing the import settings and testing
different export formats until the most stable configuration was identified.
At one stage, certain objects started moving unexpectedly
within the scene. After investigation, it was discovered that this was caused
by the simultaneous presence of both mesh colliders and box colliders on the
same objects. Restarting the debugging process from the beginning allowed us to
isolate the problem and resolve it by cleaning up redundant colliders.
We also faced challenges with the choice of SDK, as it
directly influenced the Unity version required for proper compatibility. This
constraint sometimes limited the features we could use and adapting to it
required additional testing and adjustments.
Finally, simulating transitions between physiological states
proved to be a significant challenge. Modeling the shift from pathological to
normal condition, such as restoring coronary blood flow after an intervention
required more than static changes. To ensure immersion, we tried to synchronize
animations, shaders, and physiological parameters, allowing for smooth and
medically plausible transitions.
However, by combining online researches, trial-and-error
experimentation, and the insightful guidance of our supervisor, we were able to
identify the right resources and effectively overcome these obstacles.These
experiences not only strengthened our technical skills, but also emphasized the
importance of patience, iteration, and systematic debugging in XR
development.
Chapter 3. Presentation of the solution and discussions 3.3.
Discussion
32
3.3 Discussion
The developed prototype provides two complementary learning
modes: a guided experience and an autonomous experience of PCI and CABG
procedures, both designed to address coronary obstructions. Through this
application, learners are immersed in a simulated operating room equipped with
the necessary instruments, enabling them to become familiar with operative
techniques, understand the role of each tool, and progressively develop
surgical reflexes in a risk-free, immersive setting. This approach enhances
experiential learning and bridges the gap between theoretical knowledge and
practice.
Nevertheless, the current version of the prototype presents
several limitations. First, the graphical quality, while functional, lacks the
photorealism of advanced commercial platforms which integrate highly detailed
anatomical models and lighting effects. Second, the system does not yet include
complex autonomous scenarios with unexpected complications, which are essential
for preparing students for the unpredictability of real-world interventions.
Third, the absence of haptic feedback reduces the ability to practice fine
motor skills and the tactile dimension of surgery. Fourth, the software is
limited to single-user mode and does not support collaborative training
sessions, whereas some commercial systems already integrate multi-user
experiences.Fifth, the current version does not include detailed assessment
tools such as performance metrics, error tracking, or progression analysis,
while commercial solutions often provide comprehensive dashboards that enable
trainers to objectively evaluate and track learners' skills. Finally,
optimization issues such as build size, performance drop with complex assets,
and limited device compatibility still restrict large-scale deployment.
Despite these limitations, the proposed solution demonstrates
notable strengths. Its accessible cost makes it considerably more affordable
than many commercial VR simulators, which often require expensive licenses and
specialized hardware. Moreover, its current ability to operate offline ensures
that learners can benefit from the training experience without relying on
constant internet connectivity.Although it has not yet achieved the
sophistication of international benchmarks, it provides a promising, adaptable,
and scalable foundation to advance cardiology training through im-mersive
technologies.
|